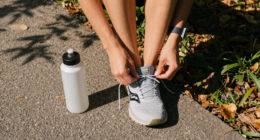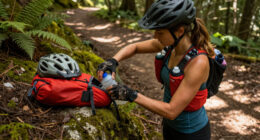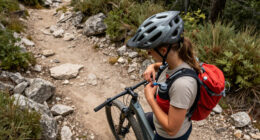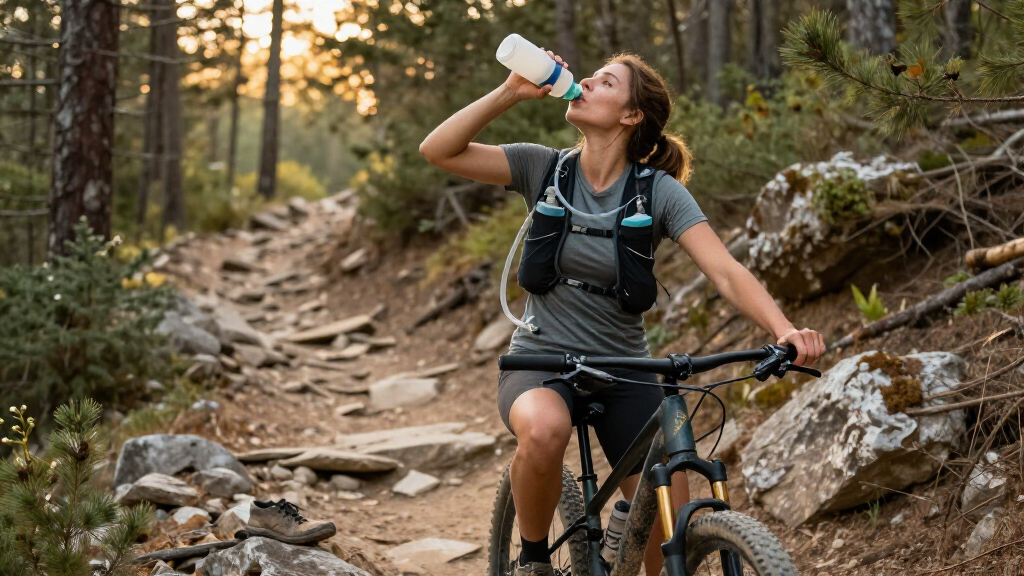

This guide helps you choose, adjust, and test a hydration pack for mountain biking. It is for riders who want hands-free access to water without a pack that bounces, rubs, leaks, or restricts movement. You will finish with a loaded pack that sits securely, delivers water through its hose, and carries the gear you need for a ride. No special repair skills are required; allow about 20–40 minutes to set up the pack, then test it on a short ride.

Get sports gear delivered free — and shop member deals
- Fast, free delivery on millions of items
- Access to Prime Big Deal Days deals on October 6–7
- Prime Video, Amazon Music and more included
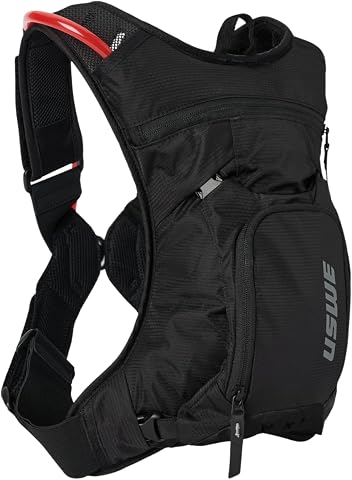
USWE MTB Hydro Hydration Pack with 2L Bladder
- ✔ Pack capacity: 3 liters
- ✔ Bladder volume: 2 liters (70 oz)
- ✔ Weight: 0.59 kg
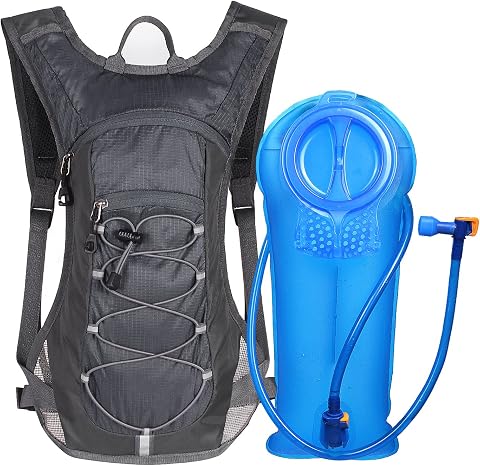
Unigear Hydration Pack with 2L Water Bladder
- ✔ Pack dimensions: 16.5 x 8 x 6 in
- ✔ Bladder capacity: 2 liters (70 oz)
- ✔ Weight with bladder: 1.1 lb

Lightweight 12 L Hydration Backpack with 2 L Water Bladder
- ✔ Pack capacity: 12 liters
- ✔ Weight: 8.5 oz
- ✔ Bladder capacity: 2 liters
Difficulty: Beginner | Time: 20–40 minutes, plus time to test on a short ride
What You’ll Need
Tools & Materials:
- Mountain bike hydration pack with a compatible reservoir and drinking hose
- Drinking water
- Ride essentials you expect to carry, such as a phone, keys, snacks, tire repair items, and a lightweight layer
- Towel or sink for filling and leak checks
- Your usual riding helmet and clothing for fit testing
Knowledge:
- Basic familiarity with your ride length and the gear you typically carry
- Ability to adjust pack straps and operate the reservoir’s bite valve
Pack capacity depends on ride duration, weather, and access to refills. A compact pack may suit short rides with minimal gear; longer or remote rides may call for more water and storage. Check the pack maker’s instructions for reservoir care and carrying limits. Do not assume every reservoir or hose connector fits every pack.
USWE MTB Hydro Hydration Pack with 2L Bladder
For riders who want a pack designed around movement on a bike, USWE MTB Hydro is the clearest all-round choice in this group. Its adjustable NDM 1.2 harness is intended to minimize bouncing, addressing a concern that matters more on uneven trails than on a casual walk. Ventilated straps and a ventilated back panel also make the design feel more focused on active riding than the simpler Unigear setup.The pack has 3 liters of total capacity and includes a 2-liter bladder, so there is space beyond water without moving up to the 12-liter model. Its detachable organizer pocket can reduce the pack to 2 liters for race days, giving us a useful way to switch between a more practical trail configuration and a leaner one. The slider opening, ice compatibility, and Plug-n-Play coupling add flexibility to filling and connecting the bladder.Compared with Unigear, USWE offers more purpose-built fit and organization details, but it is not the choice for carrying a large load. Its bladder still holds only 2 liters, and the listed chest range is 33–43 inches, which may not suit everyone. The 12-liter pack offers substantially more stated storage and a lower listed weight, though without the same cycling-specific harness detail. We would choose USWE when pack stability and ride-oriented design matter more than maximum capacity.
Pros:
- NDM 1.2 harness is designed to help limit bouncing during rides.
- Detachable organizer lets us shift between 3-liter and 2-liter configurations.
- Bladder has a slider opening, ice compatibility, and Plug-n-Play coupling.
- Ventilated panels and reflective details suit active trail use.
Cons:
- Included bladder capacity is limited to 2 liters.
- Stated chest-size range may not fit every rider.
Best for: Mountain bikers who want a cycling-focused, adjustable fit and enough space for water plus a modest set of essentials.
Not ideal for: Riders who need more than a 2-liter bladder, want a large load-carrying pack, or fall outside the stated 33–43-inch chest range.
Bottom line: We’d choose USWE for its combination of cycling-specific stability and adaptable storage, provided its fit range and 2-liter bladder work for us.
“We’d choose USWE for its combination of cycling-specific stability and adaptable storage, provided its fit range and 2-liter bladder work for us.”
Unigear Hydration Pack with 2L Water Bladder
Unigear makes the most sense when we want a basic hydration pack that can move between cycling and other active outings. It weighs 1.1 pounds with the bladder and includes adjustable shoulder, chest, and waist straps. That gives riders several points to tune the fit, although the description does not identify a specialized mountain-bike harness like the one on USWE.The included 2-liter replaceable bladder has an airflow system and screw cap, while the small front pocket handles a few essentials. That compact layout keeps the pack uncomplicated, but it also sets a firm limit: riders carrying a repair kit, snacks, phone, and an extra layer may find the pocket short on room. By contrast, the USWE has a detachable organizer and more explicitly cycling-oriented fit features; the 12-liter pack provides more stated storage for riders whose rides call for additional gear.Unigear’s nylon fabric is described as splash-resistant, not fully waterproof, so we would treat it as suitable for light spray rather than dependable wet-weather protection. It is a sensible pick for shorter rides where we mainly need water and a few small items, or for someone who wants one pack for cycling, hiking, and running. We would skip it if we need organized trail storage or a clear advantage in rough-terrain stability.
Pros:
- Lightweight, compact construction for active use.
- Adjustable shoulder, chest, and waist straps help tune the fit.
- Includes a replaceable 2-liter bladder with airflow system.
- Simple design can serve cycling and other outdoor activities.
Cons:
- Small front pocket limits trail-gear capacity.
- Splash-resistant fabric is not presented as fully waterproof.
- Less cycling-specific fit detail than the USWE option.
Best for: Riders looking for a straightforward, compact 2-liter hydration pack with adjustable straps for mixed activities and shorter rides.
Not ideal for: Mountain bikers who carry several tools or spare layers, need more storage, or want clearly specified cycling-specific stabilization.
Bottom line: We’d pick Unigear for uncomplicated water carrying on shorter rides, not for riders who need substantial storage or a specialized MTB fit.
“We’d pick Unigear for uncomplicated water carrying on shorter rides, not for riders who need substantial storage or a specialized MTB fit.”
Lightweight 12 L Hydration Backpack with 2 L Water Bladder
When water is only part of what we need to carry, the 12 L Hydration Backpack stands apart. Its stated capacity is much larger than the 3-liter USWE and compact Unigear, creating more potential room for ride-day essentials. The listed weight is 8.5 ounces, and the pack uses a breathable mesh back with adjustable shoulder and chest straps. For riders who want a light pack with space for more than a phone and snacks, that capacity-to-weight proposition is its defining appeal.The included 2-liter PEVA bladder has a leak-resistant bite valve, so the larger pack does not mean more water than the other two. Instead, the extra room is for gear. Multiple pockets are listed, but their sizes and arrangement are not specified; we should not assume they will neatly fit every tool, pump, or spare layer. USWE provides a more detailed cycling-oriented organization story, while Unigear makes a more compact choice if we have little to carry.Its PU-coated nylon is described as waterproof and tear-resistant, and the breathable back and adjustable straps are useful considerations for cycling. Still, the available details do not establish how the pack behaves under sustained rain or on particularly rough trails. The product information also provides no review feedback, leaving less independent context about fit and durability. We would choose it for capacity and low stated weight, but riders who value clearly described MTB-specific fit may prefer USWE.
Pros:
- 12-liter stated capacity offers the most room in this lineup.
- Listed weight is 8.5 ounces.
- Includes a 2-liter bladder with a leak-resistant bite valve.
- Breathable mesh back and adjustable straps support an active fit.
Cons:
- Pocket sizes and organization are not clearly described.
- Bladder capacity is still 2 liters, matching the smaller packs.
- Product details provide no review feedback to help assess fit or durability.
Best for: Riders who want a lightweight pack with substantially more stated storage than the other options for clothing, food, and ride essentials.
Not ideal for: Riders seeking a compact race-day profile, detailed storage organization, or a cycling-specific harness with clearly described stabilization.
Bottom line: We’d select this pack when extra storage and low listed weight outrank a compact profile or highly specified MTB fit.
“We’d select this pack when extra storage and low listed weight outrank a compact profile or highly specified MTB fit.”
As an Amazon Associate we earn from qualifying purchases.
Before You Start
Try the pack on with your normal riding layers, not just a thin shirt. A fit that seems comfortable indoors can feel different over rough trails, with a helmet on, or when you bend forward. Pack weight affects bounce and handling, so test with the water and gear you expect to carry.
Use clean, drinkable water and inspect the reservoir, cap, hose, and bite valve for dirt, damage, or residue before filling. If a part is cracked or the valve leaks, replace or repair it according to the manufacturer’s instructions before riding.
Step-by-Step Instructions
Step 1: Choose capacity for your rides
List how long you usually ride, how much water you drink, whether you can refill en route, and which essentials you carry. Compare packs by both reservoir volume and storage space; advertised capacity may refer to the whole pack rather than the water bladder alone. Choose a pack that holds the gear you need without leaving large amounts of empty space that let items shift.
For a first setup, prioritize a stable fit, a reservoir that is easy to clean, and storage for your ride essentials. Check that the pack’s back panel, straps, and hose routing suit your body and riding position.
Tip: Do not choose a pack solely by the largest water capacity. Extra water adds weight, and an oversized pack can move around when partially loaded.
Check: You can identify the reservoir volume separately from the pack’s storage capacity, and the pack has room for your planned essentials without unnecessary bulk.
Step 2: Inspect and clean the reservoir
Remove the reservoir from the pack and check its seams, cap, hose connection, and bite valve. Wash it using the care instructions supplied by the manufacturer, especially if it is new or has been stored for a while. Rinse away any cleaning solution and let the parts drain or dry as directed.
Reconnect the hose and valve, making sure each fitting is seated fully. If the reservoir has a shutoff valve, learn how to open and close it before you install the bladder.
Tip: Avoid hot liquids unless the reservoir maker specifically approves them. Heat can damage some materials or fittings.
Check: The reservoir and hose are clean, the fittings are attached firmly, and you can operate any shutoff mechanism.
Step 3: Fill the reservoir and check for leaks
Fill the reservoir with the amount of water you expect to carry, staying within its marked capacity. Close the cap securely, wipe off spills, and hold the reservoir upright over a sink or towel. Squeeze it gently and inspect the cap, seams, hose connection, and valve for drips.
Open the shutoff, if fitted, and sip through the bite valve to confirm water flows. Close the shutoff again before putting the reservoir in the pack. Follow the maker’s directions if the hose must be detached for filling or cleaning.
Tip: Do not overfill the bladder. A full reservoir needs room to close correctly and may be harder to fit into its sleeve.
Check: No water escapes when you gently squeeze the reservoir, and water flows through the valve when it is open.
Step 4: Load the pack with ride essentials
Place the reservoir in its designated sleeve and route the hose through the pack’s intended opening. Load heavier, compact items close to your back and position them so they do not press sharply against the reservoir. Put frequently used items, such as a snack or phone, in pockets you can reach without unpacking everything.
Secure loose items in compartments or pockets, then close all zippers and buckles. Keep sharp tools covered or separated from the bladder and hose. Do not carry more than you need; excess gear increases weight and can make the pack harder to stabilize.
Tip: Arrange the hose so it will not catch on the bike, snag on branches, or cross a strap where it could be pinched.
Check: The reservoir sits flat in its sleeve, essential items are contained, and no sharp edge is in direct contact with the bladder.
Step 5: Adjust the pack on your body
Put on the loaded pack over your riding clothes and position it as the pack maker recommends. Tighten the shoulder straps evenly until the pack rests close to your back without pulling uncomfortably on your shoulders. Fasten and adjust the chest strap so the shoulder straps stay in place while you move.
If your pack has a waist or stabilizing strap, fasten it snugly without restricting breathing or bending. Move your arms, turn your torso, and lean into a riding position. Adjust the straps in small increments until the pack stays centered and does not rub your neck, shoulders, or lower back.
Tip: Straps should stabilize the pack, not compress your chest or limit reach to the handlebars. Recheck fit after loading water because the added weight changes how the pack hangs.
Check: The pack remains centered when you bend and turn, and you can breathe freely, move your arms, and reach the riding position comfortably.
Step 6: Position and test the drinking hose
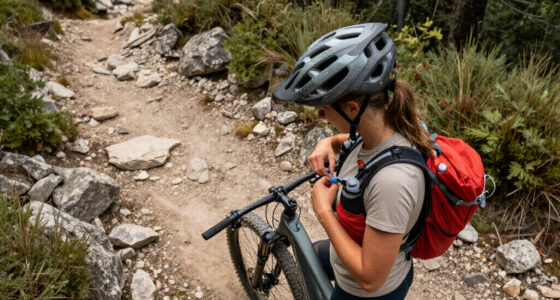
Route the hose over the shoulder that feels natural and secure it with the pack’s clip or keeper. Position the bite valve where you can reach it without pulling the hose tight or turning your head far. Open the shutoff, if present, and test a sip while standing, then while leaning forward as you would on the bike.
Check that the hose does not hang near a wheel, snag on your helmet, or interfere with your arms or handlebar controls. Reposition the clip or shorten the loose route if it swings when you move.
Tip: A hose that is difficult to reach may be routed incorrectly or may need a different keeper position. Do not cut or alter it unless the manufacturer allows that adjustment.
Check: You can reach the valve and drink without taking off the pack, and the hose stays clear of moving bike parts and your riding position.
Step 7: Test the complete setup before a long ride
Wear the fully loaded pack and walk, bend, and move your arms to check for bouncing, rubbing, or shifting. Then take a short ride on familiar, low-risk terrain. Drink from the hose while riding only if you can do so safely; otherwise stop first. Pay attention to strap pressure, bladder movement, hose reach, and whether the pack affects your ability to look around or control the bike.
After the test, check for leaks and adjust the load or straps if needed. Make one change at a time so you can tell which adjustment improves the fit.
Tip: Do not test a new or poorly adjusted pack for the first time on a remote or demanding ride.
Check: The pack stays in place during movement, the hose works as expected, and no leaks or uncomfortable pressure points appear during the short ride.
Common Mistakes to Avoid
- Buying a pack with more capacity than the rides require. — Compare the actual reservoir volume and storage compartments with your usual ride needs. Remember that unnecessary water and gear add weight and can increase bouncing.
- Leaving the reservoir partly unsecured or loading heavy gear against it. — Use the reservoir sleeve, keep sharp items separated, and place compact heavy gear close to your back so it cannot press into or shift the bladder.
- Tightening straps until breathing or movement feels restricted. — Adjust straps gradually with the pack loaded. Keep it stable but comfortable, then check your reach and riding posture before setting off.
- Skipping a leak and hose-flow check. — Test the filled reservoir over a sink or towel, then confirm that water flows through the valve and the shutoff works before packing the bladder.
Troubleshooting
Problem: The reservoir leaks around the cap or hose connection.
Solution:
Remove the bladder, empty it if needed, and check that the cap is aligned and fully closed and that the hose fitting is seated. Inspect seals for dirt, twisting, or damage, then reconnect and repeat the gentle squeeze test. Replace damaged parts rather than relying on a loose fit.
Problem: Water will not flow through the hose.
Solution:
Check that the shutoff valve is open, the hose is fully connected, and the bite valve is not blocked or twisted. Detach and rinse parts only as the maker directs. If flow remains blocked, inspect for a kink or damaged valve and replace the affected part.
Problem: The pack bounces or shifts on rough ground.
Solution:
Reposition the pack on your back, tighten the shoulder straps evenly, and adjust the chest or stabilizing strap if provided. Secure loose contents and remove unneeded gear. Test again with the loaded pack before riding more demanding terrain.
Problem: The hose swings, catches, or is hard to reach.
Solution:
Use the pack’s hose clip or keeper and route the hose along the intended shoulder path. Adjust its position while wearing your helmet and moving into a riding posture. Keep it away from the wheels, bars, and controls; stop riding if it cannot be secured safely.
What Success Looks Like
Your setup is ready when the filled reservoir passes a leak check, water flows through the bite valve, and the hose stays secured and clear of bike controls and moving parts. The loaded pack should sit centered without bouncing, rubbing, or limiting breathing, arm movement, or your riding position. Confirm these points during a short test ride, then inspect the pack once more for leaks or shifted gear.
Next Steps
After the ride, empty and clean the reservoir and hose according to the manufacturer’s care instructions, then dry or store them as directed. Rinse dirt from the pack and check straps, clips, zippers, and the bladder for wear before your next outing. Refill with fresh water before riding, and adjust the load and water quantity to match the route, weather, and refill access. Replace any damaged bladder, hose, valve, or buckle before using the pack again.
Frequently Asked Questions
How much water should I carry in a mountain bike hydration pack?
Carry an amount suited to the ride length, weather, your drinking needs, and access to refill points. Check the reservoir’s capacity and avoid filling beyond its marked limit. For an unfamiliar route or hot conditions, plan water conservatively and identify refill options when possible.
How tight should a mountain bike hydration pack be?
It should stay close to your back and remain centered when you bend or turn, but it should not restrict breathing, arm movement, or your reach to the handlebars. Adjust shoulder straps evenly and use a chest or stabilizing strap only if the pack has one.
Can I put sports drink in the reservoir?
Check the reservoir manufacturer’s instructions first. Some reservoirs can hold drink mixes, but sugar or other ingredients can leave residue and make cleaning more demanding. Clean the reservoir and hose promptly after using anything other than water.
How do I stop water from sloshing in the reservoir?
Fill only the amount you need and follow the reservoir maker’s directions for removing excess air, if it provides that method. Seat the bladder flat in its sleeve and secure it so it cannot move. Avoid manipulating valves or seals in ways the manufacturer does not recommend.
Should I wear the pack over or under a jacket?
Wear it in the position that gives a stable fit and leaves straps and the drinking hose accessible. Try the pack with the clothing combination you expect on the ride. If a jacket goes over the pack, check that it does not trap the hose or prevent access to closures.
Halloween Picks
halloween
As an affiliate, we earn on qualifying purchases.