TL;DR

Get sports gear delivered free — and shop member deals
- Fast, free delivery on millions of items
- Access to Prime Big Deal Days deals on October 6–7
- Prime Video, Amazon Music and more included
A mountain bike hydration pack is a backpack designed to carry a water reservoir and let you drink through a hose while riding. Choose capacity for your ride and refill options, then prioritize stable fit, useful storage, easy cleaning, and secure hose routing; bottles or a waist pack may suit short or hot rides better.
A full reservoir can make a long climb feel like you strapped a small water tank to your shoulders. A well-fitted one lets you sip without taking your hands off the bars. That tradeoff is why choosing a mountain bike hydration pack is about more than picking the biggest bladder on the shelf.
A hydration pack is a backpack designed to carry water in a flexible reservoir, with a hose and bite valve that bring the drink to you while you ride. Many packs also carry tools, food, a spare tube, and a light layer. In this guide, you’ll learn how to match water capacity, pack layout, fit, and cleaning to your routes—and when bottles or a waist pack make more sense.
Think of your pack as trail support, not a hydration prescription. A two-hour shaded loop with refill access calls for a different load from a long, exposed ride far from water. Choose for the ride you actually plan to do, and your pack is more likely to feel like useful gear than a sweaty, bouncing burden.
A mountain bike hydration pack carries water through a reservoir, hose, and bite valve; it can also hold tools, food, and a light layer.
Many reservoirs hold about 1.5–3 liters, but water capacity and gear-storage volume are different measurements.
Choose pack, bottle, or waist-pack capacity around ride length, weather, exertion, and refill access—not maximum advertised capacity.
Test fit with the pack loaded, secure the hose, and store heavier gear close to your back to reduce bouncing.
Clean and fully dry the reservoir after use, especially after sports drinks, and follow the manufacturer’s care instructions.
What a Hydration Pack Does on the Trail
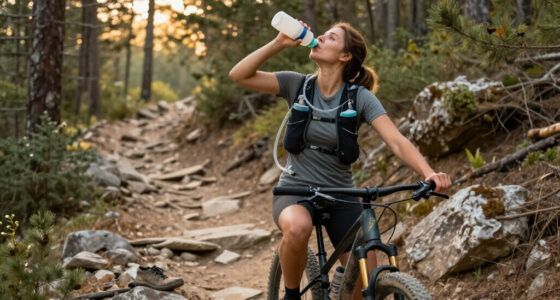
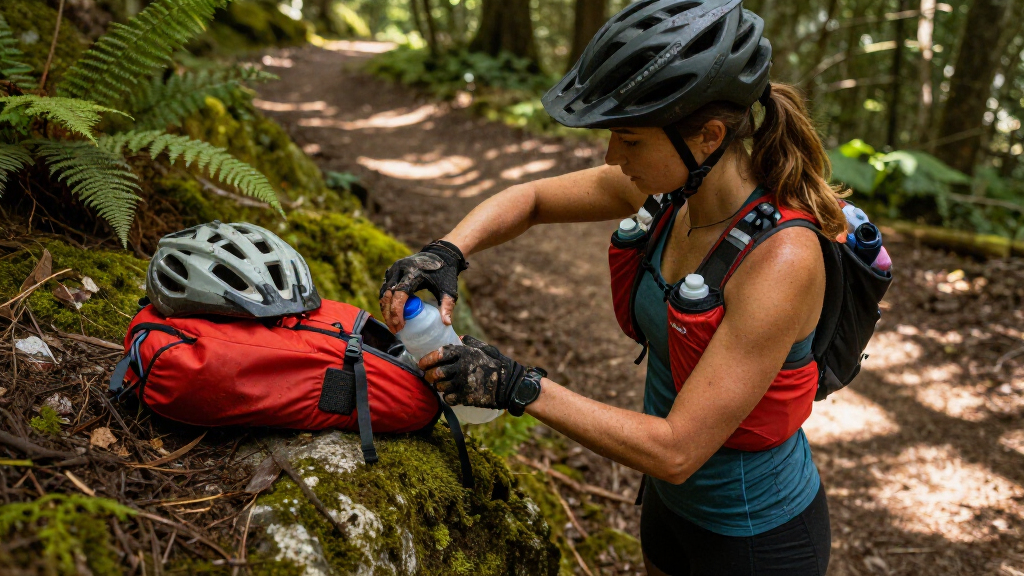
A mountain bike hydration pack carries water in a flexible reservoir and feeds it through a hose, so you can drink without stopping or reaching for a bottle. Most models also give you space for ride essentials such as a tube, tire levers, food, and a phone. The simple idea: water and useful gear ride on your back, ready when you need them.
The reservoir, often called a bladder, connects to a hose with a bite valve at the end. You bite or press the valve to drink, then let it close. That setup can be handy on rocky singletrack, where taking one hand off the handlebar to grab a bottle can feel awkward just when the trail asks for your full attention.
A rider tackling a winding, two-hour trail might take small sips during a steady climb without stopping at every switchback. That convenience is the pack’s main trick: it puts water within easy reach. But the pack also adds weight and covers your back, so it may feel less appealing on a short ride in hot weather.
Some riders choose a bottle or waist pack instead, and there’s no rule that says you must wear a backpack. A bike with limited bottle-cage space may push you toward a pack; a roomy frame and a short local loop may point the other way. Match the carry system to the terrain and ride length, rather than treating one setup as the only right answer.
As an affiliate, we earn on qualifying purchases.
Pick Water Capacity for Your Route, Not the Biggest Number
Choose reservoir capacity according to ride duration, weather, effort, and refill access—not just the largest number on the label. Many packs carry roughly 1.5–3 liters, but those figures describe water capacity, not the total storage space for tools and clothing. A bigger reservoir gives you more carrying room, but every extra load adds weight you’ll feel on climbs.
Here’s a real-world comparison: for a short, familiar loop with a fountain halfway through, a smaller reservoir may be plenty. For a longer remote ride under a bright afternoon sun, you may want more water and extra food, provided the route and your needs support carrying it. There is no single water amount that fits every rider; temperature, exertion, body size, and opportunities to refill all matter.
Before you buy, sketch the ride: how long you expect to be out, where you can refill, and what else you need to carry. That quick check keeps “maximum capacity” from becoming an excuse to lug unnecessary water. It also helps you distinguish two specs that can look confusing when you shop.
| What the number describes | What you can carry | Example |
|---|---|---|
| Reservoir capacity | Water inside the bladder | 1.5–3 liters is a common range |
| Pack volume | Space for gear around the reservoir | Tools, snacks, a phone, or a light layer |
Key fact: reservoir capacity and pack volume are separate measurements. A pack with a larger gear compartment does not automatically carry more water, so check both figures before choosing.
bike hydration backpack with tool storage
As an affiliate, we earn on qualifying purchases.
As an affiliate, we earn on qualifying purchases.
Choose Bottles, a Waist Pack, or a Backpack for Your Riding
Use a backpack-style hydration pack when hands-free drinking, extra water, and gear storage suit your route; use bottles or a waist pack when a lighter, less-covered feel matters more. A hydration pack is not automatically better than bottles. It trades easy access and carrying space for more weight and warmth on your back.
On a quick after-work lap, a frame bottle may be all you need, especially if the bike has room and the route passes close to home. On a full-suspension bike with little bottle-cage space, a pack can solve a practical storage problem. A waist pack can split the difference for riders who want water and tools without a full backpack covering their back.
Recent gear designs include compact trail packs, waist packs with bottle-carrying options, more organized pockets, and reservoirs built for easier filling or cleaning. Those are broad design trends, not a guarantee that any particular model is new or best-selling. Check current manufacturer specifications and independent reviews if you’re comparing named products.
Use this quick route check before you choose:
- Short, familiar ride: Start with a bottle or small carry option.
- Limited frame space or technical trails: Look at a stable pack with easy hose access.
- Long or remote ride: Plan water, food, tools, and refill points together.
- Hot weather: Weigh extra carrying capacity against the warmth of back coverage.
For example, if you’re riding a hot, exposed loop with several refill points, a waist pack and bottles could feel cooler than a large backpack. The best setup is the one that supports your route without carrying gear you won’t use.
mountain bike water reservoir 3 liters
As an affiliate, we earn on qualifying purchases.
As an affiliate, we earn on qualifying purchases.
Get a Stable Fit and Keep Gear from Bouncing
A well-fitted pack stays close to your body without bouncing, squeezing your breathing, or interfering with your helmet movement. Adjust the shoulder, sternum, and waist straps to secure the load, then test it when the reservoir is full. A pack that feels fine empty can shift once water and tools start sloshing and knocking around.
Fit is the difference between hearing only tires on dirt and listening to a loose buckle slap your back all ride. Put the pack on over your usual riding layers, fill it as you would for the trail, and move as if you were climbing, descending, and looking over your shoulder. The harness should hold the pack steady without making a deep breath feel like work.
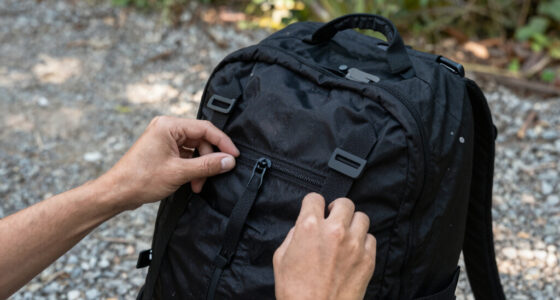
Pack layout matters just as much. Put heavier items close to your back, secure tools in a dedicated pocket, and stop small objects from rattling around in a large compartment. For example, if a multitool slides to the bottom every time you drop off a rock ledge, a separate organizer pocket will save you a frustrating search at the trailhead.
Route the hose so it stays easy to reach and doesn’t flap against your chest. Check whether the valve has a shutoff to help prevent leaks, and see if the pack gives you a clear place to secure the hose when you’re not drinking. Try the pack loaded, not just on a shop hanger; you’ll learn much more from a few minutes of moving around than from a quick glance in a mirror.
mountain bike hydration pack with hose
As an affiliate, we earn on qualifying purchases.
As an affiliate, we earn on qualifying purchases.
Stay Comfortable Without Expecting a Cool, Dry Back
Back panels and shoulder straps can affect pressure and heat buildup, but no backpack can keep your back completely dry during hard riding. A shaped panel or airflow-friendly design may help, yet you’ll still feel the pack against you on a hot climb. Comfort depends on fit, pack size, clothing, pace, and your own preference.
Imagine a slow, steep ascent on a warm afternoon: your jersey is damp, your shoulders are working, and the reservoir feels heavier than it did at the parking lot. That’s a normal tradeoff, not necessarily a sign you bought the wrong gear. A smaller pack, a lighter load, a bottle, or a waist pack may work better when heat matters more than extra storage.
Look beyond marketing language and try to judge contact points. Do shoulder straps rub your neck? Does the back panel press into one spot? Can you turn your head freely with your helmet on? A pack should not obstruct helmet fit or restrict movement, and a protective back panel should never be assumed just because the pack covers your back.
Back protection is a separate feature unless the product specifically says it includes protective elements. If that feature matters to you, check the exact specifications and how the pack fits with your riding kit. A rider on rough, technical trails may value a secure fit and verified protection features, while a casual gravel connector might put more weight on low bulk and ventilation.
Make Cleaning Easy Before the Reservoir Gets Funky
A pack is easier to live with when you can clean and dry its reservoir, hose, and valve without a wrestling match. Look for a wide reservoir opening, removable hose connections, and replacement parts that work with that specific model. Regular care matters most after sugary sports drinks or when a wet bladder gets left zipped in a warm pack.
Plain water is generally simpler to clean up after than a sweet drink. Sugary residue can leave odors and encourage unwanted growth, so check the manufacturer’s care instructions and clean more thoroughly after anything other than water. If you finish a ride and leave the reservoir wet in a dark gear closet, don’t be surprised if the next sip has an unpleasant smell.
Make cleaning part of your post-ride routine: empty the reservoir, wash it and its components according to the maker’s instructions, rinse thoroughly, and let everything dry completely before storage. A reservoir that opens wide is easier to reach inside and easier to air out. Some products tolerate certain cleaning methods while others don’t, so don’t assume a bladder is dishwasher-safe or freezer-safe.
Also check the hose connections, seams, buckles, and zippers now and then. A reservoir has no fixed lifespan; use, storage, and material condition all play a role. If it cracks, leaks, or cannot be cleaned adequately, replace it. That small check before a big ride beats discovering a slow leak halfway up a dusty climb.
Frequently Asked Questions
How much water should a mountain bike hydration pack hold?
Many packs use reservoirs in the 1.5–3 liter range, but the right capacity depends on ride length, weather, exertion, and refill access. Plan for your route instead of treating the pack’s maximum capacity as a personal hydration target.
Is a hydration pack better than water bottles?
It depends on your bike and ride. A pack offers hands-free drinking and room for gear, while bottles can be simpler to clean and may feel cooler to carry. Some riders use both, especially when frame space and route length allow it.
How do I stop a hydration pack from bouncing?
Choose a size that fits, adjust the straps, and avoid overloading the pack. Put heavier items close to your back, secure loose tools, and route the hose so it cannot flap around.
Can I put sports drink in the reservoir?
Check the manufacturer’s guidance first. Sugary drinks can leave residue and odors, so clean the reservoir, hose, and valve thoroughly after use and let every part dry completely.
How often should I clean my hydration pack?
Clean and fully dry the reservoir after use, following the maker’s instructions. Clean it promptly after sports drinks or if it has been left wet, and inspect it for leaks, cracks, and worn connections.
Conclusion
Choose the smallest, most stable setup that carries what your route actually calls for. Check both water capacity and storage space, load it before judging the fit, and be honest about how much back coverage you can tolerate in the heat.
Then take it on a familiar loop before trusting it on a long remote ride. You want to hear the tires hiss over dirt—not a hose slap, a loose tool, or a bladder sloshing with water you never needed.
NFL season / tailgating Picks
team gear
As an affiliate, we earn on qualifying purchases.